


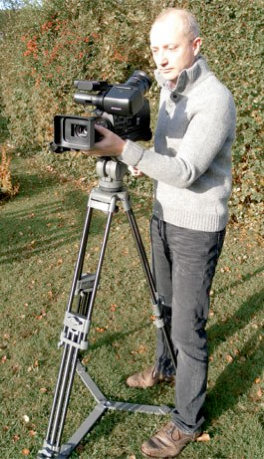
Most of our filming work is likely to be indoors, but there will always be occasions when you find yourself wanting to film outside - perhaps to do a piece to camera in front of your premises, or as location filming as part of a case study. Learning how to work around the prevailing conditions can be the difference between a successful shoot and a wasted effort.
While light is your friend when it comes to the current generation of consumer oriented small-chip cameras, too much sunlight in the wrong place can cause big problems. So be prepared to work your iris or exposure control in manual mode for best results. Don't rely on the camera to get the exposure right for you. And while a good lens hood will help you minimise stray light hitting the lens, most supplied lens hoods are really just there for cosmetic reasons. Be prepared instead to invest in a decent matte box to effectively deal with light problems outdoors.
But perhaps most problematic is noise. While filming indoors presents sound issues from echoey rooms, personnel working, people chatting, phones ringing and machinery operating, there are also plenty of noise issues outdoors - everything from ambient traffic noise to wind.
If you're filming an application where you want ambient noise - I remember filming at a micro-hydro power installation where I wanted the sound of the water - then you might get away with the camera's built in microphone. A car going by could potentially wreck the audio, but you might be able to loop a good bit to salvage the day. Alternatively you could ditch the recorded sound track and add audio from a sample library.
If you have someone talking to camera, the built-in mic is unlikely to help you, especially if it's on a default surround-sound setting. What you really want is a directional mic as close to the subject as possible.
Then, of course, there is the problem of wind. You might feel wind, but your camera is going to hear it. If you have no choice but to carry on filming, then wind is a particular challenge. In an ideal world you'd use a directional shotgun mic on a boom pole just above your subject, encased in a blimp and with a fluffy around the whole basket. You might also get similarly good results with a tie-clip radio mic, again with a big fluffy around it. You'd also then use a high pass filter to cut everything below a couple of hundred Hz, since wind noise quite often presents itself as a bass rumble.
There's a good video here that illustrates how wind noise is mitigated as you add more accessories to your boom mic, compared with a standard fluffy on the built-in camera mic, but you have to be able to isolate the audio channels to really hear what's going on as the video puts the built-in mic on the left channel and the boom mic on the right.
Note how, at the start, the built-in mic actually does slightly better than the boom mic, presumably because the camera body is offering some shelter. So if your camera is very close to the subject you might actually get better results than with an unprotected boom mic. But as the video goes on, more accessories are added to the boom mic, and by the end of the video the wind noise on that channel has been virtually eliminated.
The simple foam windshields supplied with most microphones aren't terribly effective in heavy wind. For best results, look out for the fluffy microphone covers with names like wind jammers or dead cats. And look, too, for baskets or blimps, some of which can actually be fitted to external microphones in-situ on the camcorder.


Filming successfully outdoors
Sunday, 7 April 2013

MARK SIMMS © 2013 All rights reserved